
本PS视频教程是关于Photoshops摄影照片后期处理工作流程教程,时长:2小时,大小:750 MB,MP4高清视频格式,作者:Lisa Carney,语言:英语。
Photoshop是Adobe公司旗下最为出名的图像处理软件之一,集图像扫描、编辑修改、图像制作、广告创意,图像输入与输出于一体的图形图像处理软件,深受广大平面设计人员和电脑美术爱好者的喜爱。多数人对于PHOTOSHOP的了解仅限于“一个很好的图像编辑软件”,并不知道它的诸多材应用方面,实际上,Photoshop的应用领域很广泛的,在图像、图形、文字、视频、出版各方面都有涉及。
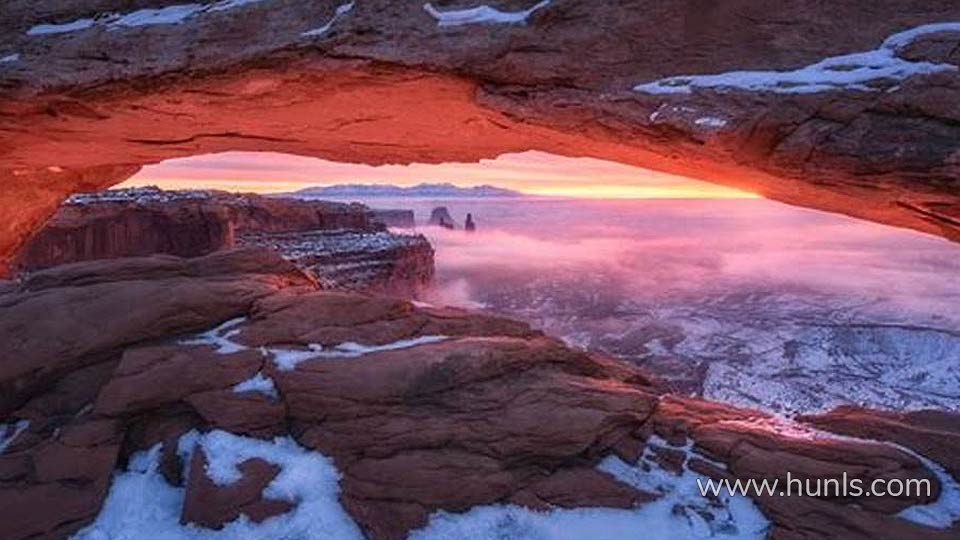
In this Video I show you my entire post processing workflow from start to finish. Step by step I will guide you through my techniques based on the picture “The Burning Window”. I will also cover how you organize your workflow. The goal is to be non destructive so you can always readjust your images later. This picture is one of my favourites and thats one of the reasons why I chose it to demonstrate you my workflow. The techniques are advanced so first expierences with masks and a basic knowledge about post processing is necessary. The following steps will be covered:
– RAW Adjustments in Adobe Lightroom CC
– Focus stacking to increase depth of field
– Exposure Blending to increase dynamic range
– How I use the orton effect
– Detail enhancement
– Nik Color Efex Pro 4 in the Nik Collection by Google
– Advanced and selective contrast adjustments
– Working with luminosity masks
– Advanced masking techniques
– “Dodge & Burn” techniques
– Color adjustments and color contrast
– Mood enhancement using “light painting”
– Color management
For this turorial I used the programs Adobe Lightroom CC, Adobe Photoshop CC and the Nik Collection by Google.
本站资源由互联网搜集整理而成,版权均归原作者所有,仅供观摩学习,不保证资源的可用及完整性,不提供安装使用及技术服务。
若无意中侵犯到您的版权利益,请来信联系我们,我们会在收到信息后会尽快给予处理!版权说明点此了解!

评论(0)